Are you planning to start accepting American Express debit and credit cards? It’s a great decision, so pat yourself on the back for that! Now, you can provide improved customer experiences because they love to be given numerous payment options. Moreover, it is excellent news for your Amex-only buyers, whom you could not serve all these days.
Whether you welcome your buyers online or in-store, you can attract more American Express cardholders, thus boosting your sales and ROI. Furthermore, you can save time and money by offering more payment options, reducing queues, and simplifying your checkout process.
Now that you have decided to accept Amex cards, it’s time to open a merchant account with American Express. You can either apply for your merchant services online or offline. This American Express Merchant Services Application Guide will walk you through the entire process, detailing the documents and other essentials you need during the application process. We will also provide a step-by-step guide on registering for your American Express merchant account.
Table of Contents
American Express Merchant Services Application Guide

You will need to fill up an application form to register for Amex merchant services. You will get the appropriate application form online or offline. We will guide you on that. But before even starting to fill up the form, you should check whether you have the following.
- All the fields in the application form are mandatory (unless stated otherwise), and you should not leave them blank to increase your chances of approval.
- Don’t forget to attach a copy of your NRIC, FIN identification, passport, and Business Profile. Include all the documents of all beneficial owners and authorized signers. You may also be required to submit additional documents to prove your business identity, as and when asked by the merchant account provider or American Express.
- Enclose a copy of a canceled or voided cheque, a bank statement, or any bank-printed deposit slip as proof of bank account.
- Attach a copy of the power of attorney or board resolution.
- After completing the form, ensure you have dated and signed it appropriately.
When your application gets approved, be prepared for the following.
- You will receive your complimentary Welcome Pack and POP (Point of Purchase) materials from American Express, which will be delivered to your business establishment.
- You will receive an email from Amex at your registered email ID. The email will include your User ID and Password, along with other login details – so you can access your OMS (Online Merchant Service) account anytime, anywhere.
- You should expect and be ready for a terminal enablement visit from an appointed Amex representative or vendor.
- You should receive a welcome call from an American Express Merchant Services representative.
The Required Fields on the Application Form
You can contact American Express for a merchant services application form online or offline. You will be required to fill out the following fields on the form.
- Under the ‘Merchant Business Information’ field, you will be required to fill in your registered name (as per ACRA), registered business address, business email address, reading name (if different from the registered name), GST number, entity type (such as partnership, sole proprietor, public, government, or private sector, etc.), and contact number.
- Next, there will be a ‘Payment’ section, where you must mention the payee’s name, postal code, country, and payment address (if different from the business location).
- The form will also include a ‘Direct Credit’ segment, where you must enter details like bank name, account number, and bank ID. You should also attach a copy of the bank statement or canceled/voided cheque to your form.
- Next, under the ‘Statement’ field, you should check the areas where you wish to receive your Amex credit/debit card statement: a) by electronic or b) by post. Also, check the applicable box to see whether you wish to receive the statement a) weekly or b) monthly.
- Now proceed towards the section that says ‘Resolve Disputes’. Under this segment, tick the required checkbox if you wish to manage your Card Member disputes, such as chargebacks or identify thefts, online.
- After that, you will see a segment titled ‘Submission’, where you must fill in a few details, such as terminal and online enablement, bank merchant number, bank name, etc.
- Next, you will be taken to the ‘Authorized Signatories’ section, where you must enter the personal and contact details of your primary and secondary signatories.
- Following that, you should fill up the ‘Beneficial Owner’ segment, where you must submit the personal and contact information of beneficial owners 1, 2, 3, and 4.
- In the final section of ‘Connected Party,’ you must make a few signatures and fill in certain fields, such as the type and number of the ID document.
How to Set Up and Manage Your Merchant Account
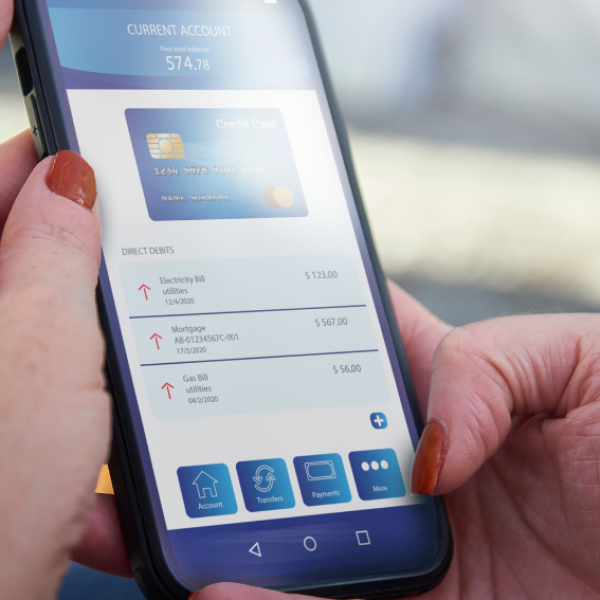
In today’s digital world, you can manage your merchant account online. You can log into your account and manage all your transactions, customize your account settings, and update your business profile. In short, you can do everything from your online merchant account and even access it by logging in from your mobile device.
Here are a few simple steps to establish and manage your merchant account.
Step 1: Activate Your Online Account
First and foremost, you should set up your merchant account online. Once you have an account, you can view, access, and manage all your financials. You can even update your account information and respond to disputes by logging into your account.
To get started, visit the merchant account registration page of American Express. Then, you will be required to accomplish the following steps:
- Verify your merchant account: In this step, you should tell more about yourself and your business. You will need to follow the on-screen prompts that will show up one after the other. After finishing them all, your merchant account will be successfully created.
You need to enter your merchant account number and the postcode linked to your account. You must return to your paper statement if you cannot find your merchant account. You will find a section below ‘Payee Location’ at the top left corner. Here, you will find your merchant account number.
After entering that number, you can proceed toward the next two steps if it matches Amex’s system and records. However, if the numbers mismatch, you can try again or receive a message to contact Amex’s merchant services representative. They can help you find the right merchant account information based on their records. You may be asked to provide a few merchant-related information in that case.
- Create Your User ID and Password: Next, it’s time to set up your user account. Again, you should follow the on-screen prompts. Initially, you will be asked to create your user ID and passwords. You will also be asked a little about your business, such as your name, role, etc. At any stage, if you need help creating your user ID or password, click on the ‘i’ icon beside every field to check the detailed guidelines.
You might wonder whether your employees can access your business account. Yes, you can open multiple user IDs, which you can link to your merchant account number. This will allow your allocated employees to access and manage your merchant account online to perform necessary business operations, such as financing, auditing, or managing your Amex card sales.
Remember that each team player will need to set up their unique user ID and password to access your merchant account. You can even do that on your employees’ behalf, following the 3-step registration procedure.
For an added layer of security and authentication, enter a security question and its answer. You will need this while resetting your password if you forget it or wish to change it for security purposes, especially when it’s shared with multiple employees. Whenever an employee leaves, changing passwords to combat compromised security and safety is better.
Next, enter your name, phone number, and email ID so the team can contact you about your account whenever needed. Securely note down your merchant account’s user ID and password and remember them for smooth logins in the future.
- Manage Finances: Only you will see this option if you have entered the correct merchant number in the first step. You can tick or untick a particular feature or solution (all of which have been pre-ticked for you by default), based on your unique business requirements. The three major options include:
- View Payments: View and download all your American Express card transactions. You can view and receive your e-statements here. The best part is that your finance team can track when you will receive payments for submission.
- Manage Your Account: You can edit or update details on your profile details.
- Resolve Disputes: Disputes and chargebacks are every merchant’s worst nightmare. However, when it happens, you should be prepared to take action and combat the claims made with appropriate evidence. You can view all your chargebacks and disputes in one place so that you won’t miss any disputes.
After completing the above steps, enter your bank account details and hit the ‘Create Account’ button. Amex’s system will verify your bank and merchant account details for privacy and security reasons. For successful verification, use the bank account linked to the account where you receive all your Amex payments, your ‘Payee account’.
However, if you don’t have your bank account details handy right now, don’t worry, you can still proceed with your registration but with limited access. If you feel, you can pause the account activation process here and come back when you have your bank account information with you.
In that case, you can click on the “Don’t have financial information ready?” option, following which you will get two options: “Continue creating an account” and “Add finances later”. If you wish to continue, click on “Create Account”. Or you can return and select “I have my Bank Details Ready”.
Don’t worry; you can still order essentials, such as online logos, signage, and other business materials. Till then, you can complete the remaining steps and establish your merchant account successfully. Remember that unless you submit bank details, you won’t be able to manage your finances digitally.
After hitting the “Create account” option, you must accept the terms and conditions of account usage and other policies. Go through every word and sentence before signing the contract. If you have doubts regarding certain terms or policies, contact the American Express merchant service team for further guidance. After reading, click on “I Agree, Continue”.
You are all set and ready to manage your merchant account online. You can fully use and take advantage of the benefits of various online and merchant tools provided. These will help you manage your merchant account and cash flow efficiently.
Step 2: Understand Your Merchant Account Dashboard
After successfully registering your merchant account, log in with your passwords, and you will be taken to your Account dashboard. While this dashboard will help merchants access all their payments, statements, disputes, and other tools under one roof, one should first understand how to navigate through different options.
You can check out the latest notifications and alerts by clicking on the arrow logo beside the Latest Alerts on the top. In the dashboard’s top left corner, click on the Menu option. Expand the arrow beside it to check the complete and detailed menu. Here, you can also find the full summary of all your payments, including the latest transactions made and upcoming payments. This page or window will directly link to another window that provides access to all your e-statements.
Next, you can check a few examples or samples of American Express’s complimentary merchant supplies and signs. You can check out the complete selection of all the available merchant tools and features by clicking the ‘Browse Selection’ option. Here, you can choose your desired products/solutions, order, and receive the deliverables at your business installment.
Step 3: Update Your Profile
In the final step, update your merchant account profile and make the necessary changes in accident information or settings. You can manage and edit all these online. Click the ‘Profile and Settings’ option and choose the field you want to update. After clicking on ‘See All,’ you will see various options, such as managing locations, contact details, notifications/alerts, etc.
- Change Password: After hitting the ‘Change Password’ button, follow the on-screen parrots to change your password.
- Contact information: In this segment, you can update your name, business role, phone number, email address, etc. However, contact the dedicated customer service team if you wish to change any business or legal information. Also, you can change any information from your profile only to ensure maximum security and safety. At this stage, you can even opt-in to receive any special features, benefits, perks, or offers you may get via your registered email address.
- Notifications: Modify your ‘Notifications’ under this segment and select the kind of emails you get regarding different arenas of your account, such as account updates, payments, or disputes. You can receive all such notifications via the email address you have provided in the ‘Contact information’ section on the form.
If you wish, you can add a distinct email ID solely to manage your disputes and chargebacks. You can add this separate email ID during this stage, provided you have finished your ‘Manage finances’ option earlier. It will activate your account and give you full access to your merchant solutions.
To organize our dispute notifications, you can sort them by recent, urgent, and updated inquiries. Another best way to learn about your disputes and chargebacks is by receiving and checking your disputed email regularly. It will help you to avoid no-reply disputes or chargebacks.
- Manage Locations: To safeguard your privacy and legal aspects, you won’t be allowed to edit all your chainsaw details online. You can change a few details, such as correspondence and physical addresses. Here, you can see a list of all the locations associated with your merchant account. You can click on the plus icon ‘+’ to review the details of every location. Finally, hit the ‘Edit’ button to make the necessary alterations. You can always return to the location summary window/page by clicking the ‘-’ icon.
The Common Pitfalls You Should Avoid
You must avoid the following mistakes while setting up your merchant account online.
- Not doing proper research about the terms, conditions, and fees of the merchant solution provider (in this case, American Express)
- Ignoring mobile payments
- Overlooking complex terms and conditions – to avoid unfavorable situations, to cope with them, understand every word used, and review the terms and conditions page thoroughly. Here, pay close attention to hidden costs, transaction charges, and chargeback fees.
- Not implementing or not complying with the correct security measures and tools, such as getting a PCI DSS (Payment Card Industry Data Security Standard)
- Not integrating business systems efficiently, thus hampering business continuity.
- Underestimating chargeback and dispute management – merchants should implement chargeback prevention techniques, streamline the process of managing disputes, and communicate the return and exchange policies to their consumers.
Key Takeaways
Setting up a merchant account is challenging – even the slightest error may make or break your business. So, follow the above-detailed steps and avoid the common mistakes for a successful merchant account activation. Take the time to understand, read through, and navigate every option to make informed decisions.